How To Remove Graphics Card? If you want to remove your graphics card, first turn off your computer and unplug it from the power supply. Next, remove the screws that hold the card in place. Finally, gently pull the card out of the slot. If you’re having trouble removing the card, consult your computer’s manual for more instructions.
Why Should I Remove My GPU?
People would desire to remove the GPU from their computers for many reasons. Your reason for removing it may influence how you go about it:
If installing a new graphics card, you should remove the GPU, wires, and software. You’ll need the space for whatever card you’re replacing it with.
Just remove it from its location in the casing to troubleshoot and keep it plugged in. Many troubleshooting techniques will need the card to acquire power, and it does not need to be attached to the case to operate. However, disconnecting the wires before removing the GPU from the case is still recommended.
If you clean the card, you may take it out of the case and unplug the wires. In such a situation, you may leave the power cable and motherboard connection connected.
Keep your reasons for uninstalling the GPU as you go through the processes. You don’t want to modify the sequence, but you should also take the steps necessary to get it out of the tower.
Is It Complicated to Open a PC Case?
Not!
Depending on your components and how everything was initially configured, the inside of your PC will be either neat and straightforward or a complete mess.
We’re talking about wires protruding from the floor, dust everywhere, unknown items, and a slew of pointed objects that may or may not cause your index finger’s current condition.
PC building is a lovely thing and a pastime that may (and most likely will) interest you for years to come, but it can also be a terrible experience – and we mean that.
Most items are pointy, have several screws, and often require force. And, well, things become much more difficult if you choose a smaller casing.
We’ll attempt to be as straightforward as possible in this section.
It is preferable to cover all bases than to presume you already know something and leave you without all the knowledge you may want!
So, for the sake of this tutorial, we’ll suppose you’re new to PC tinkering and have opened up your computer for the first time with a specific aim: to remove/replace your graphics card!

How To Remove Graphics Card? A Step-by-Step Guide
1. Instructions:
Procedures to Take Before Removing the Graphics Card
Before installing the new graphics card, start the computer and delete any current graphics drivers/software (refer to Article CCC-Uninstall).
Please contact the manufacturer for instructions on deleting the graphics drivers if AMD did not build the graphics card or onboard graphics.
Power off the PC and any connected devices.
To minimize any computer damage, wait 20 seconds before detaching all cords from the rear of the computer (power supply cord, audio/display cables, and so on).
Take off the case cover. System builders have procedures for removing the case cover; please see the manual for details.
2. Removing the Graphics Card
Static electricity has the potential to harm computer components. Wear an antistatic wrist strap attached to a grounded item before handling system components to discharge any static energy. Local computer stores provide an affordable antistatic paper wrist strap.
Unplug any internal wires that are attached to the graphics hardware (i.e., dedicated power connections, if applicable).
Find and remove the graphics card from the case’s mounting bracket.
Pull gently on the expansion slot lever to remove the card from the slot.
Slide the graphics card out of the slot and disconnect it from the computer.
Pack your graphics card in an antistatic bag.

How To Install A Graphics Card?
It’s pretty simple to install a new graphics card or utilize your existing one after cleaning since you reverse the method for removing the GPU.
When installing a new graphics card, you should consider your system requirements while selecting a card.
In such a situation, installing the new GPU is straightforward.
Here’s what you should do:
You should install the new GPU in the same PCI-e slot you removed from the old one.
The first (X16) slot is the greatest since it has the maximum bandwidth of any slot.
It is also the closest to the CPU, which may speed up communication between the two components.
Push the tab to open the PCI-e slot and ready it for the new graphics card.
Remove the metal covers on the expansion card holes if you’re installing a new GPU for the first time.
Inserting the graphics card into the holes is simple after opening the PCI-e slot.
You can’t go wrong since the metal connections can only be attached one way, and the GPU’s fans must be oriented downward.
Align the card’s primary connection with the grooves within the slot.
You should jiggle the card until it is appropriately positioned and the I/O plate slides into its designated area.
Gently push down on the graphics card until you hear a click that indicates the card has fit into the slot.
Attach the graphics card to the expansion slot plates using the screws (if any).
Depending on the GPU make and model, you may need to connect the power connections to the card.
Most gaming graphics cards are like this since they need more power.
These are the unique six-pin connections, which are not found anyplace within the PC.
It’s simple to link them.
To ensure that they’ve settled, listen for a click.
These wires should be linked to the PSU; depending on the PSU, you may need to attach eight or six plus two connections.
Then, tighten the screws on the side panel to shut the case.
1. Connect The Monitor And Other Peripherals
After you’ve installed the graphics card, connect all of the other devices, including the monitor and keyboard, and power on the computer.
Make that the monitor wires are plugged into the correct connectors, which belong to the graphics card, not the motherboard.
These connectors are located on the expansion cards panel towards the bottom of the casing.
Otherwise, the graphics card will not be linked to the display, resulting in a dark screen.
You may start the computer and boot up the system after connecting all the cords.
2. Install The Drivers
After starting up the system, your display will be operational, and you will be able to control various system components.
Installing display adaptors, on the other hand, is required to get the most out of your new GPU.
If you already have the drivers downloaded and stored on your computer or an external storage device, you may install them using Device Manager.
When you open Device Manager, expand it by clicking on Display Adapters and then right-click on your graphics card.
To install the drivers, choose Install device and follow the on-screen prompts.
You may now fully use your new graphics card and begin playing games on your PC.

How To Choose The Best Graphics Card For Your System?
If you wish to update your present graphics card, be sure it is compatible with your system specifications and demands.
For example, if you want to use the new graphics card for gaming or visually heavy jobs such as editing, you must ensure that it can handle these high-demand tasks.
The following are the critical parameters to consider:
1. Integrated Vs. Dedicated
Whether you have an integrated GPU, you may be wondering if you can utilize a separate one to increase the performance of your PC.
In general, you may utilize a dedicated and integrated GPU in the same system as long as its specifications allow it.
Because integrated graphics cards are merely chips on the CPU rather than separate cards, they have poorer performance than dedicated GPUs.
Furthermore, unlike discrete GPUs, an integrated GPU lacks dedicated RAM.
Consequently, when you execute visually intensive activities, your system will slow down since the GPU will take up a significant amount of RAM.
However, when purchasing any dedicated GPU, you should consider the same variables we’ll discuss here.
You should also consider if you want to use two graphics cards in parallel to improve performance.
Not every graphics card offers this capability, so seek two identical GPUs that can operate in parallel and make sure your motherboard supports this arrangement.
Read more: Are Integrated Graphics Good For Gaming? Integrated vs Dedicated
2. Power Supply
Because specialized graphics cards use a lot of electricity, they need their power source.
You should ensure that your computer’s power supply can manage the graphics card’s power requirements.
Depending on the GPU, a power output of 300W-600W may be required.
Consider the power requirements of other components, such as the CPU.
You should tally up their power needs and ensure that the total is less than the maximum output of the power supply unit.
3. Monitor’s Specs
You cannot utilize your graphics card to its maximum extent if your display does not support it.
If your display has a lower refresh rate than your graphics card, your gaming is confined to the lower refresh rate.
If your display has a more significant refresh rate than your graphics card can handle, you’ll be limited to the refresh rate of your GPU.
The same is valid for resolution.
If you play games at high resolutions and have a 4k display, you’ll need a strong graphics card that meets these requirements.
Finally, if you want to use multiple screens, your graphics card should support it since not all graphics cards are designed to do so.
4. Interface
If you plan to improve your gaming system by replacing the GPU, ensure the interface matches the PC.
The majority of today’s GPUs utilize PCI-e slots. However, the number of slots they occupy might vary, including single, double, or triple slots.
You should consider all components that go into the PCI-e slots and ensure a good place for the new graphics card.
5. Size
Not all graphics cards are compatible with every PC enclosure.
The reason for this is that GPUs, like PC casings, come in a variety of sizes.
Consequently, you must ensure that the graphics card’s form factor matches that of the PC case and that it can fit inside the chassis without sacrificing any components.
Furthermore, the casing should have enough space to allow for adequate ventilation.
Otherwise, the system would struggle to cool its internals, mainly the GPU, which gets hot rapidly.
6. Connections
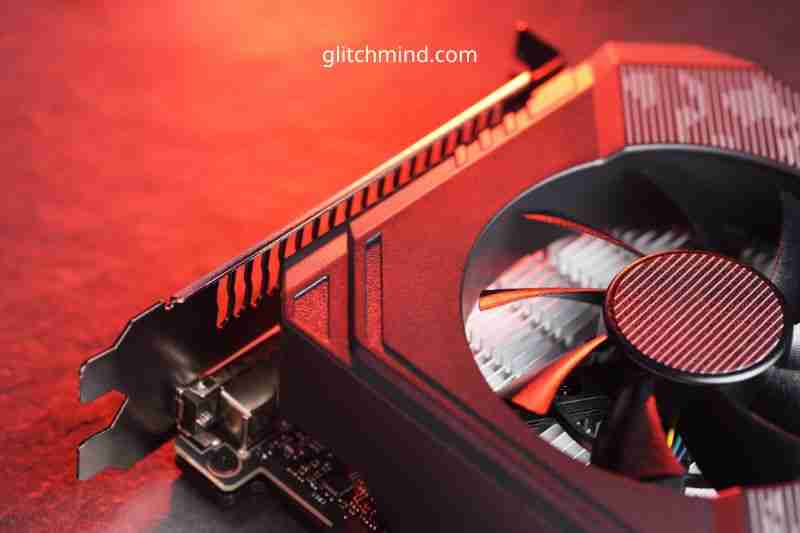
As you can see above, the graphics cards have outputs that link to the monitor.
These outputs may be of several varieties, such as HDMI, DVI, VGA, and DisplayPort.
HDMI and DisplayPort are the most recent connection types, and they are found on the majority of graphics cards.
You want a graphics card that can handle additional connections.
You won’t be restricted to certain displays this way and may even connect your graphics card to older screens.

FAQs
1. Can a graphics card be removed?
It most certainly can! You’ll have to remove it if you decide to get a more powerful one later on or if your current one breaks down.
Your graphics card is one of several components within your computer that can be replaced, improved, and tinkered with in various ways.
2. Can all graphics cards be removed?
They certainly can! At least standard ones are linked to your motherboard through the PCIe slot.
Their outer appearance has no bearing on this – your GPU may be removed regardless of how it appears.
Triple fan designs might seem intimidating, but don’t let their appearance fool you; they, too, can be removed anytime you choose!
3. What happens if I remove my graphics card?
Nothing significant or dangerous.
A graphics card’s primary function is to deliver a visual signal to your display, allowing you to interact with your computer.
You won’t be able to use your PC unless your CPU has an integrated graphics card (or iGPU, for short).
4. Can I break my PC when opening it up?
Unfortunately, you can, but only if you’re irresponsible.
You cannot harm your components or for things to go wrong if you follow our step-by-step tutorial.
Be cautious and patient, and avoid using excessive force. Your gear is a lot more sensitive than it seems, and this is something you should keep in mind.
5. My graphics card is stuck. What do I do?
The first step is to determine why it is stuck.
Fortunately, there are only a few plausible causes, so the procedure should be simple.
6. Have all cables been disconnected? The ones on the back of the GPU and inside the case?
Have all of the screws been removed? Depending on the size of your graphics card, you’ll most likely need to remove at least one, if not two, screws.
Did you engage the built-in safety latch on the right side of the PCIe slot?
If you’ve done everything else, you’ll probably have to use a little more force to pull it out.
Remember that your graphics card is perpendicular to your motherboard, so keep that angle in mind while removing it. You risk harming it if you tilt it in any other way.a
Read also:
GTX 1060 vs RX 570: Which Is Better In 2022?
Conclusion
Removing a GPU from a computer may seem simple, but as with anything in life, the details count. The method you take it out, unscrewing it before pulling it out, ensuring the PCIe latch is released, and removing any software and drivers that came with it are all critical aspects of performing a proper removal.
If you’re upgrading, keeping your older GPU safe is critical. And, if you’re pulling it out for cleaning, make sure it’s immaculate before reinstalling it on your PC. Anything you do with enough confidence and expertise will become second nature.

